If you’ve ever shrugged on a pack that felt perfectly fine in your hallway, and then felt every single gram of it by the second hour of walking, you already understand why the 20% rule exists.
It’s one of the oldest bits of advice in backpacking, and one of the most misunderstood. People quote it, argue about it, and break it all the time, usually without being sure what it actually says.
So here’s the straight version. In this guide I’ll explain what the rule is, how to calculate your own number in kilograms or pounds, when the rule works, when it quietly lets you down, and how to get your pack under the limit without spending a fortune. I’ll also cover something almost every other article skips: what the rule means when you’re travelling through Asia, where airline cabin limits, humid heat, crowded buses and Himalayan trails all change the maths.
your fully loaded backpack should weigh no more than about 20% of your body weight. At 70 kg, that’s roughly 14 kg. Treat it as a ceiling, not a goal. Lower is almost always more comfortable.
Table of Contents
ToggleThe 20% Rule for Backpacking, Explained
The 20% rule for backpacking says your fully loaded pack, including food, water and fuel, should weigh no more than about 20 percent of your body weight. Someone who weighs 70 kg (154 lb) should aim to carry no more than around 14 kg (31 lb). Many experienced hikers aim lower, closer to 10 to 15 percent.
Where the Rule Comes From
There’s no single person who invented it. The 20% figure is a rule of thumb that outfitters, guidebooks and park rangers have passed around for decades, because it’s simple and it roughly matches what the human body can carry for days without breaking down.
It’s loosely supported by research on load carriage, mostly studies of soldiers, which links heavier loads to faster fatigue, more foot and back problems, and a higher chance of injury.
I want to be honest about what the rule is, though. It’s a starting guideline, not a law of physics, and it doesn’t know anything about your fitness, your height, the terrain or how long you’re walking each day. We’ll get to that.
Which Weight Counts? Base Weight, Pack Weight and Skin-Out Weight
This is where most articles get vague, and it’s the part that causes the most confusion. Three different numbers get thrown around:
| Term | What it includes | Used for |
|---|---|---|
| Base weight | Everything in your pack except food, water and fuel | Comparing gear setups, ultralight goals |
| Pack weight (loaded weight) | Base weight plus food, water and fuel | The 20% rule |
| Skin-out weight | Pack weight plus everything you wear and carry in your hands | Total load on your body |
The 20% rule is meant to be applied to pack weight, the number on the scale when you’re standing at the trailhead, ready to walk, with water and food on board. If someone tells you their pack is “only 8 kg” but they’re talking about base weight and forgetting three litres of water and four days of food, the real number is quite different.
How to Calculate Your 20% Limit (kg and lb Chart)
The Formula
It couldn’t be simpler. Multiply your body weight by 0.20.
Example: you weigh 70 kg. 70 × 0.20 = 14 kg. That’s your ceiling for a fully loaded pack.
In pounds it’s identical. Weigh 154 lb, multiply by 0.20, and you get about 31 lb.
| Your body weight | 10% (ultralight) | 15% (comfortable) | 20% (upper limit) |
|---|---|---|---|
| 50 kg (110 lb) | 5 kg | 7.5 kg | 10 kg (22 lb) |
| 60 kg (132 lb) | 6 kg | 9 kg | 12 kg (26 lb) |
| 70 kg (154 lb) | 7 kg | 10.5 kg | 14 kg (31 lb) |
| 80 kg (176 lb) | 8 kg | 12 kg | 16 kg (35 lb) |
| 90 kg (198 lb) | 9 kg | 13.5 kg | 18 kg (40 lb) |
Bookmark this page if you like. It’s the chart I wish I’d had the first time I tried to work out whether my bag was reasonable.
How to Weigh Your Pack Properly
Don’t guess. People are consistently wrong about how heavy their pack is, and almost always in the optimistic direction. Here are two easy ways to get a real number:
- Luggage scale. A cheap hanging scale is the easiest tool. Hook it to the top handle, lift, read the number.
- Bathroom scale. Weigh yourself, then weigh yourself holding the pack, and subtract the first number from the second.
Do it with the pack fully loaded, exactly as you’d leave in the morning: water bottles full, snacks in, jacket stuffed in the lid. And remember that water weighs a full kilogram per litre, which is the sneakiest weight in your bag. Food adds up too, roughly 0.5 to 0.9 kg per day depending on what you pack.
Is the 20% Rule Actually Realistic?
For many people, yes. For some, it’s too generous, and for others it’s strangely restrictive. Here’s where it holds up and where it doesn’t.
When the Rule Works Well
- Multi-day trips on moderate terrain
- Hikers of average build and reasonable fitness
- Beginners who need a sensible safety limit
- Trips where you carry your own food, water and shelter
When the Rule Breaks Down
If you’re small or light. Twenty percent of 50 kg is only 10 kg. A tent, sleeping bag, mat, stove, food and water can eat that up fast, so smaller hikers often have to work harder on gear weight than anyone else. It isn’t unfair, it’s just maths, and it’s worth knowing before you buy gear.
If you’re heavier or less fit. The rule is based on body weight, but your body weight isn’t the same as your carrying strength. Twenty percent of 95 kg is 19 kg, which can be punishing for knees and ankles if you haven’t trained for it. If you’re building fitness, start well under the limit.
If you’re tall or short-torsoed. Pack fit matters as much as pack weight. A well-fitted 14 kg pack can feel better than a badly fitted 10 kg one.
If conditions are harsh. Cold weather means heavier insulation. High altitude makes every kilo feel like two. Long stretches without water mean carrying more of it. In all of these, the “real” feeling of the load goes up even if the number on the scale doesn’t.
If the trip is short. On a one-night trip you can sometimes go a little over, because you won’t be carrying it long enough to hurt.
Fit Matters as Much as Weight
A good backpack puts most of the load on your hips, not your shoulders. The hip belt should sit over the top of your hip bones, and the pack’s frame should match your torso length, which is the distance from the bump at the base of your neck down to the top of your hip bones. If the bag doesn’t fit, even a modest load feels heavy. Get measured in a shop if you can, and adjust the shoulder straps, load lifters and sternum strap every time you put the bag on.
How Far and How Fast You're Walking
The same 14 kg feels completely different depending on your day. Eight kilometres on a flat path with a lunch stop is one thing. Fifteen kilometres with a steep climb and a descent that hammers your knees is another. The more distance and elevation you plan to cover, the lower your pack weight should be.
A rough way to think about it: if your days are short and flat, you can sit near 20%. If they’re long, steep or at altitude, aim closer to 12 to 15%. Your body will tell you the truth by the end of day two, but it’s much nicer to plan for it than to find out the hard way.
Target Pack Weights by Trip Type
Here’s a rough guide for a 70 kg traveller, loaded weight including water and food. Adjust it for your own body weight using the chart above.
| Trip type | Sensible loaded weight | Why |
|---|---|---|
| Carry-on-only city and hostel travel | 6 to 8 kg | Airline limits and lots of walking with the bag |
| Lodge or teahouse trek | 8 to 10 kg | No tent, stove or heavy food to carry |
| Camping trek, 3 to 5 days | 12 to 14 kg | Shelter, sleep system and food add real weight |
| Remote multi-day trek | 14 kg or slightly above, briefly | Long food carries, only sensible if you’re fit and the days are short |
Notice that only the last two rows come anywhere near 20%. Most travel in Asia sits well below it, and that’s a good thing.
20% vs 10% vs 30%: Which Target Should You Aim For?
| Target | Who it suits | What it feels like |
|---|---|---|
| About 10% | Day hikers, children, ultralight enthusiasts | Light and fast, minimal gear |
| 10 to 15% | Experienced multi-day hikers, anyone who wants comfort | Comfortable for long days |
| About 20% | Beginners on multi-day trips, standard trekking | Noticeable but manageable |
| 25 to 30%+ | Expedition loads, military-style carrying, short stints | Heavy and tiring, high injury risk |
Health groups generally suggest children carry much less than adults, roughly 10 to 15 percent of their body weight at most. If you’re travelling with a teenager, that’s worth remembering before you hand them a bag.
My own take: pick 20% as your hard ceiling, and aim for 15% on any trip where you can. That’s where hiking stops feeling like a chore and starts feeling like fun.
The 20% Rule When Backpacking in Asia

Almost every article on this topic is written for American trails, with long loops, bear canisters and campsites. Asia is a different game. Here’s how the rule changes.
Cabin Baggage Limits Often Matter More Than 20%
If you’re flying on budget airlines around Asia, your real limit may not be 20% of your body weight at all. It might be the airline’s cabin allowance, which on many low-cost carriers is commonly around 7 kg, with some allowing 10 kg or more. Checked bags cost extra, and on short hops the fees can cost more than the flight itself.
For a 70 kg traveller, 7 kg is only 10% of body weight. That’s an ultralight target, which is why carry-on-only travel in Asia rewards smart packing so much.
Heat, Humidity and Monsoon Weight
In hot, humid places you’ll drink more and sweat through clothes quickly. That means carrying more water, but also choosing quick-dry fabrics that weigh little and dry overnight. Cotton is a trap: it gets heavy when damp and stays that way.
During the monsoon, add a rain jacket or poncho and a pack cover or dry bags. These can add weight, but wet gear weighs far more than the cover that would have protected it.
Trekking in Nepal, Bhutan and the Himalaya
On teahouse or lodge treks, you don’t carry a tent, stove or most of your food, so your pack can be far lighter than a camping trip. Many people on these routes aim for 8 to 10 kg for the whole trek. If you’re camping, or going remote, the rule works more like it does anywhere else.
Altitude makes everything feel heavier, so be conservative. If you hire a porter, ethical operators follow weight limits to protect them, so ask about the company’s policy before you book.
The Hidden Weight of City Travel
Backpacking in Asia usually means hostels up narrow stairs, long walks between bus stands and stations, and packed trains and buses where your bag sits on your lap or in the aisle. A bag that feels fine for 200 metres can feel miserable for two kilometres in 35 degree heat.
Two things help. First, laundry is cheap and easy to find across much of Asia, so you don’t need a week of clothes, just three or four sets you can rotate. Second, watch out for souvenir creep. Every market tempts you to buy something, and it all adds weight. Ship things home or leave room in your limit.
What It Costs to Hit 20%

Getting your pack under the limit doesn’t have to be expensive. Think of it in three tiers. The price ranges below are rough, so check current prices and replace them with what you actually paid.
Tier 1: Free Fixes (₹0)
- Leave behind the “just in case” items you didn’t use last trip
- Take half the clothes and plan to do laundry
- Decant toiletries into tiny bottles or switch to solid bars
- Remove the packaging, extra cables and spare straps
- Replace the hardback book with a phone or e-reader
This alone often saves 2 to 3 kg. It’s the best return on investment in all of backpacking.
Tier 2: Cheap Upgrades (roughly ₹500 to ₹5,000 / $6 to $60)
- Quick-dry t-shirts and underwear
- Lightweight dry bags instead of heavy stuff sacks
- A collapsible or lighter water bottle
- A thin sleeping bag liner instead of a heavy sleeping bag
- A compact headlamp
- A packable rain jacket
Tier 3: Where Real Money Buys Real Savings (roughly ₹8,000 and up / $100 and up)
Your “Big Three” are the three heaviest things you carry: the backpack, the shelter and the sleep system. Upgrading these gives the biggest weight savings, but also costs the most. A lighter backpack, a lightweight tent or a down quilt can each save a kilogram or more.
My advice is not to touch Tier 3 until you’ve done Tiers 1 and 2. Buying a lighter bag while still packing too much just means carrying more in a better bag.
| Tier | Typical cost | Weight saved (roughly) |
|---|---|---|
| Free fixes | ₹0 | 2 to 3 kg |
| Cheap upgrades | ₹500 to ₹5,000 | 1 to 2 kg |
| Big Three upgrades | ₹8,000+ | 1 to 3 kg |
When the 20% Rule Matters Most: Seasons and Climates

“Best time to go” isn’t quite the right question for a weight rule. A better one is: when does my pack tend to get heaviest, and when does it matter most?
Cold Seasons and Mountains
Winter and high-altitude trips are when 20% gets tight. Warm layers, a heavier sleeping bag and extra food all add up. If you’re heading into the cold, start with a lower target and be strict about everything else in the bag.
Monsoon and Tropical Seasons
You’ll carry lighter clothes, but waterproofing adds weight, and wet kit is heavy. Pick items that dry fast and keep a dry bag for anything that must stay dry, such as your phone, documents and a spare set of clothes.
Shoulder Seasons: The Sweet Spot
Spring and autumn in much of Asia tend to be milder, with less extreme heat and cold. It’s the easiest time to carry a lighter pack, which makes it a great window for first-time multi-day trekkers. Always check the weather for your specific route, because mountain conditions vary a lot.
- Winter / high altitude: aim for 15% or less before insulation
- Monsoon: prioritise quick-dry and waterproofing
- Shoulder seasons: easiest time to stay well under 20%
How to Cut Your Pack Weight, Step by Step

- Weigh everything. Lay all your gear out and write the weight of each item down. This is called a gear shakedown, and it’s eye-opening.
- Cut the extras. Remove duplicates and anything you haven’t used on previous trips.
- Look at the Big Three. Your bag, shelter and sleep system are usually the heaviest, so see if there’s a lighter version.
- Plan food and water. Carry only what you need until the next resupply or water source.
- Repack and re-weigh. Check the final number against your 20% limit.
An Example Before and After
Here’s an illustrative example of how a pack can shrink without losing anything essential. These weights are approximate and the items are only examples.
| Item | Before (kg) | After (kg) | What changed |
|---|---|---|---|
| Backpack | 2.4 | 1.5 | Lighter frame |
| Sleeping bag / liner | 1.8 | 0.9 | Liner for warm trips |
| Rain jacket | 0.6 | 0.3 | Packable version |
| Spare clothes | 3.0 | 1.9 | Fewer items, quick-dry |
| Spare shoes | 1.0 | 0.4 | Sandals |
| Toiletries | 1.1 | 0.4 | Travel-size, solid bars |
| Electronics and chargers | 1.6 | 1.1 | One multi-port charger |
| First aid kit | 0.7 | 0.3 | Only what you’d use |
| “Just in case” items | 1.8 | 0.4 | Most left behind |
| Base weight | 14.0 | 7.2 | Saved 6.8 kg |
Add roughly 3 kg of food and water, and for a 70 kg person that changes the story completely. The “before” pack is about 17 kg, which is 24% of body weight, over the limit. The “after” pack is about 10.2 kg, which is around 15%, comfortably under it.
How to Pack Your Bag So the Weight Feels Lighter
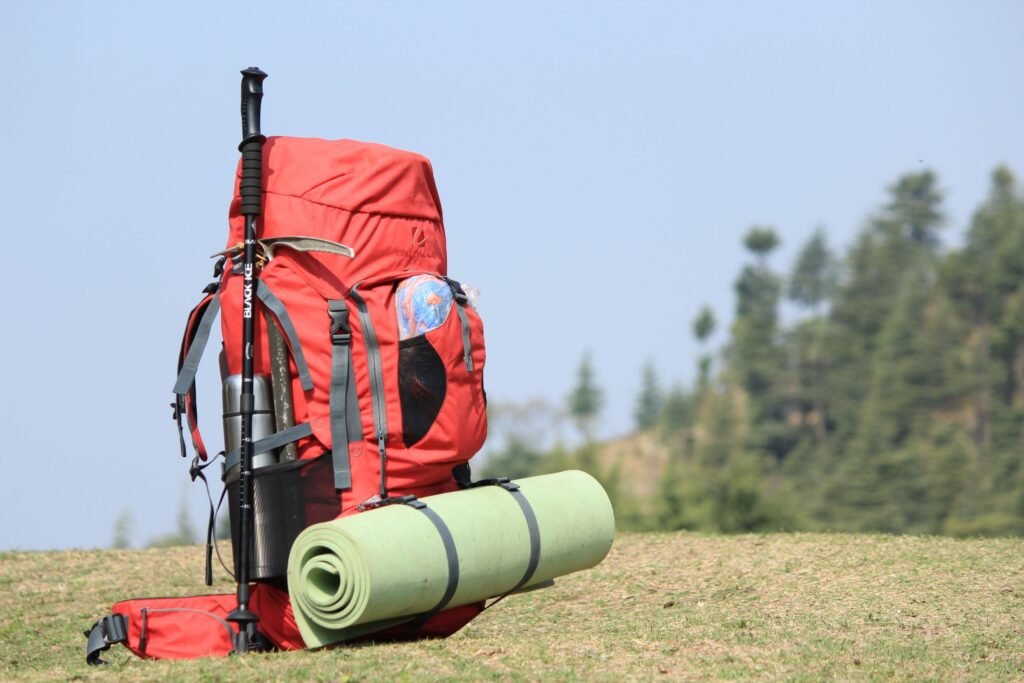
Here’s something people don’t always realise: the same 12 kg can feel very different depending on how it sits in the bag. Smart packing won’t change the number on the scale, but it changes how it feels on your back. Here’s the order I’d follow.
- Bottom of the bag: light, bulky items you won’t need until camp or the hostel, like a sleeping bag, liner or spare clothes. They cushion the base and keep the bag’s shape.
- Middle, close to your spine: your heaviest things, such as food, water reservoir or cooking gear. Keeping weight close to your back and between your shoulder blades and your waist keeps you balanced.
- Top and outer pockets: things you’ll reach for during the day, like a rain jacket, snacks, sunscreen, a hat and a headlamp.
- Hip belt pockets: phone, small snacks, lip balm, whatever you want within reach without stopping.
- Last check: tighten the compression straps so nothing shifts, then adjust the hip belt, shoulder straps and sternum strap with the bag on your back.
A pack that’s balanced and snug feels lighter than a looser one with the same load, and it’s much less tiring over a full day.
Pros and Cons of the 20% Rule
| Pros | Cons |
|---|---|
| Simple and easy to remember | Ignores fitness, height and fit |
| Scales to your body size | Can be tough for small or light hikers |
| Helps prevent overpacking and injury | Doesn’t account for terrain or altitude |
| Gives beginners a clear target | Doesn’t cover trip length or daily distance |
| Free to use, needs only a scale | Easy to misapply by using base weight |
Common Mistakes to Avoid

1. Using base weight instead of loaded weight. The rule is about the bag you’re actually carrying, with food and water in it.
2. Treating 20% as a target. It’s a ceiling. If you can be at 15%, you’ll enjoy the trip more.
3. Ignoring pack fit. A badly fitted bag makes a legal weight feel illegal. Get your torso measured and adjust the straps.
4. Packing for every “what if.” Most “just in case” items stay in the bag all trip. Pack for the likely, plan for the unlikely.
5. Forgetting water. It’s the heaviest thing you carry per day, and it changes through the day. Weigh your bag full.
6. Buying expensive ultralight gear first. Fix your packing list before you spend money. Lighter gear can’t fix a bag stuffed with extras.
7. Overpacking first aid. You do need a kit, but you don’t need a pharmacy. See our guide to the basic medicines worth packing, then trim to your route and trip length
Pro Travel Tips

- Pack heavy things close to your back, around the middle of the bag. It keeps your centre of gravity stable.
- Test-hike with your loaded pack before the trip. A few weekend walks will show you problems that a scale can’t.
- Re-weigh after repacking. Bags creep up in weight at every stop, thanks to souvenirs, snacks and extra water bottles.
- Share group gear. If you’re travelling with someone, split the stove, tent and first aid between you.
- Leave a “return bag” at your hotel or hostel base with things you won’t need on the trek.
- Put the rain cover and snacks on top where you can reach them without unpacking.
- Take photos of your final pack list so you can reuse it, and update it after each trip with what you didn’t use.
Who Should Follow the 20% Rule?
- Beginners: Follow it, and aim a bit lower, around 15%, for your first few trips.
- Light or small-framed hikers: Aim for 15% or less, and put effort into gear weight early on.
- Carry-on travellers in Asia: Your airline’s cabin limit is probably your real ceiling.
- Experienced, fit hikers: You can flex the rule, but know why you’re doing it and how long you’ll carry it.
- Ultralight fans: You’re likely already at 10 to 15%. Keep going if it’s working for you.
The 20% rule won’t make you a better hiker on its own, but it will keep you honest. It’s the quickest way to tell whether the bag on your back is a reasonable one. Weigh it, adjust it, and then go enjoy the trail.
Frequently Asked Questions
What is the 20% rule for backpacking?
The 20% rule says your fully loaded backpack should weigh no more than about 20% of your body weight. For a 70 kg person, that's roughly 14 kg. Treat it as a maximum, not a target.
Does the 20% rule include water and food?
Yes. The rule applies to loaded pack weight, which includes food, water and fuel. Base weight leaves those out, so always say which number you're talking about.
How heavy should a backpack be for a beginner?
Beginners should aim for 10 to 20 percent of their body weight, and closer to 15 percent on early multi-day trips. A lighter load gives your joints and muscles time to adapt.
Is 20% of body weight too heavy for a backpack?
It can be, particularly for smaller hikers, rough terrain, high altitude or long days. Many people are more comfortable at 10 to 15 percent, so use 20% as an upper limit rather than a goal.
What is a good base weight for backpacking?
Under about 9 kg (20 lb) is a common goal for beginners. Ultralight hikers often aim for under 4.5 kg (10 lb), though that usually requires specialist gear.
How much should a travel backpack weigh for Asia?
Many budget airlines limit cabin bags to around 7 to 10 kg, so carry-on travellers should plan around that first. Check your airline's current baggage policy before you pack.
How can I lower my pack weight quickly?
Weigh every item, remove duplicates and "just in case" extras, then look at the Big Three: your backpack, shelter and sleep system. Free fixes alone can often save 2 to 3 kg.
Does the 20% rule apply to women and smaller hikers?
Yes, the same formula applies, but it can be harder to meet. Because 20% of a lower body weight is a smaller number, smaller hikers often need lighter gear and tighter packing lists. A properly sized pack with a well-fitted hip belt also makes a big difference to comfort.
Does the 20% rule apply to day hikes?
Not really. Day packs usually weigh far less than 20% of body weight, often around 10% or less. The rule is most useful for multi-day trips where you carry shelter, food and water for several days.
Is it okay to go over 20% for a short trip?
Sometimes, yes. On a one-night trip or a short, flat walk you can stretch the limit a little, because you won't carry the load for long. Avoid going over on long days, steep climbs or at altitude, where extra weight quickly leads to fatigue and injury.
How do I know if my backpack is too heavy?
Warning signs include sore shoulders, numb hands, lower back pain, tired legs by midday and a pack that makes you lean forward. If you notice these, weigh the bag, check the fit and remove anything you don't need.